Posts

Showing posts from 2014

Artful Dodger(ing)

Image
Among the many preparations I am making for my planned trip up the inside passage is making a dodger to mitigate the discomfort of motoring northward against wind and water.  Protection from wind and waves and rain over long, cold, rainy days is problematic on a boat as small as Ripple. Then too, there are esthetic considerations.  I don't much like breaking up Ripple's classic lines with a stainless steel cage and canvas, so I am hoping to craft a suitably effective, easily removable solution without overly compromising her looks. Searching for design approaches led me to a slim, if pricey, volume by Tom Hunter: Frame Design for Boat Tops.  Hunter is an engineer by training and apparently the leading frame architect in the field.  His book is not for the faint of heart... in fact it is pretty much for canvas fabricators only -- there are precious few nods to the DIY dodger-building public.  And you won't find it in your public library.  WorldCat.org,...

Making a Tiller Pilot Cover

Image
My research into tiller pilots suggested that they are pretty reliable devices, lasting many years for some users.  Others, who relied on them for 24 x 7 blue water cruising, observed much higher failure rates, owing perhaps to greater number of hours used, but also to sun and rain.  There seems to be some agreement that making a cover for the device will improve its longevity.  It is relatively straightforward if you're handy with a sewing machine. My device is a RayMarine ST-2000, but I believe the physical form of the 2000 and the 1000 are the same, so the covers will be identical. The materials required are: (1) 28" x 14" piece of suitable fabric (I used Sunbrella) (2) 6 inches of 1" velcro (3) 3 1/4" x 6 1/4" vinyl window material (4) a grommet or sewn ring for the push-rod pass through (4) suitable thread (5) a sewing machine and basic sewing skills I have a SailRite Ultrafeed which I find to be a great machine for canvas work.  I used ...

A tale of two toddlers

Image
s/v Yare (image cadged from svyare.blogspot.com) The Center for Wooden Boats has a Third-Friday Speaker each month for most of the year.  This month's event was a particularly timely topic for me.  Tor and Jessica Bjorklund spoke on the topic of sailing the Inside Passage to Alaska... with two toddlers! Their boat, s/v Yare, will be known to many locals... I have admired her for years, seeing her often at her slip at Jensen's on Portage Bay.  Yare is a classic design whose lines Tor encountered as a 12 year old in the upstairs library at CWB.   Their traditional elegance set him on a trajectory that continues today. When he set out to build one, he found a hull for sale at bargain prices... made of steel.  Tor enrolled in the Northwest School for Wooden Boats to acquire the skills necessary to finish her out (8 years in a barn near Port Townsend).   The boat inspires admiration for her beauty and confidence for her stout countenan...

Commissioning a tiller pilot

Complaining about the difficulty of getting a tiller pilot installed and calibrated is probably a small thing compared to having an obedient hand on the tiller when your attention is required elsewhere. Still, for a device that has been around as long as the Ray Marine ST/1000/2000, one might expect clearer instructions and a better calibration interface.  There are six buttons on the device, and a lot of overloaded combinations (chords, if you will) for invoking various states of calibration and operation. Since calibration is only rarely invoked, and hence not easily retained,  best to keep that manual handy! My first attempts were near the end of a tiring, chilly day and were less than fully satisfactory.  The next day I went out on Lake Union and tried again, with greater success.  Having calibrated magnetic deviation and heading,  I tried the +40 degree test called for in the manual to assess tiller-gain.  Hit the +10 button 4 times, and the headi...

Tiller Pilots

Image
I have hovered over the acquisition of a tiller pilot for several years, once having even manufactured a mounting point for one.  I didn't install it.  Misgivings about its non-traditional complexion and fear of the siren-call of creeping complexity stayed my hand. Last summer convinced me that cruising alone without one is inconvenient, and possibly more dangerous than accommodating the additional set of failure modes of yet another electrical gadget. I decided to get a Ray Marine, and having done so had to choose between the ST1000 and the ST2000.  The additional push-rod thrust of the beefier model is appealing, but the clincher for me was the underlying technology.  The two models look nearly identical, but the ST2000 translates circular motion to linear push-rod motion via a recirculating ball drive .  According to Wikipedia: Low friction in ball screws yields high mechanical efficiency compared to alternatives. A typical ball screw may be 90 perce...

Summer Summary

Image
The Summer has come and gone without updating Ripple's blog.  I'm no better at paper logs, either, but the following is a brief summary of the last few months. Six coats of fresh varnish (le Tonkinois, of course) in the Spring Finished Stuart's Little in time for my trip north Departed for my trip north to rendezvous with Terry Noreault for a trip through the Gulf Islands and Princess Louisa Inlet on July 5.  Seattle -- Port Townsend -- Friday Harbor -- Bedwell Harbor -- Princess Cove -- Nanaimo -- Jedediah Island -- Lasquetti Island -- Smuggler's Cove -- Pender Harbor -- Thunder Bay -- Princess Louisa Inlet -- Powell River -- Pender Harbor -- Mayne Island -- Roche Harbor -- Lopez Island -- Coupeville -- Edmonds -- Seattle. I learned a tremendous amount on this trip, from sailing with Terry and from the variety of conditions and how Ripple and her skipper responded to them. The trip was terrific in many ways, including the good fun of sailing with Terry (he on S...

Piece of Cake

Image
I am still building a dinghy.  It is still almost done, a bit further down the almost-ness scale than when last I wrote. I've accepted the fact that I am not the varnisher that I once hoped to become, but c'est suffice .  After a trip abroad and the distractions of nice weather, The Big Push has begun, and the trigger is in part the baking skills of a friend, Leslie Braley.  There's a long story here, but the essence of it is that one musician has offered to play on recordings for other musicians for a kick-starter contribution of a given amount, and my friend, Leslie, wants very much for it to happen for her, and is offering cake-baking skills to raise money. Every boat christening should involve bubblified adult beverages and cake, so I have commissioned a cake for the event, and my Mom is hot to have a party, so I have to get this event scheduled.  That is, finish the damned dinghy. Today marks the 4th coat of varnish... i'll do 6 or 8.  Then I have...

The New Bronze Age

Image
This past weekend I took time out from dinghy-building to participate in the bronze-casting workshop that has been offered by the Center for Wooden Boats for a couple of decades.  Originally launched by Sam Johnson, it has been ably taught by James McMullen for the past decade and a half.  The two-day workshop at the Camano Island CWB facility takes you though the basics of managing and using a simple low-volume foundry for casting parts of bronze that can be put to work on a boat.  Take your spouse and rent one of the Cama Beach waterfront cabins. Most of us rarely use anything hotter than our kitchen stoves.  To bring 15 lbs of metal to 2000+ degrees and pour its molten spirit into a sand mold is an uncommon experience, at once primitive and technologically powerful.  Literally, transformative.  An undifferentiated chunk of alloy is transformed, by dint of conceptualizing, patterning, molding, melting, casting, and finishing, into a durable, usef...

the punchlist grows tiresome

Image
On the advice of my brother I mixed up some epoxy and diluted it with acetone to coat the dagger board, making it slightly more impervious to swelling.  I coated the entire piece with the epoxy and then wiped it down with a rag saturated with denatured alcohol, leaving the wood with a (penetrating) epoxy coating that will help keep out the moisture when it develops dings.  To not do so would be to court swelling that would make it difficult to use the board in the case. I'll sand and varnish as with other bright finishes on the boat. I used my remaining modest aliquot of Brightsides (Hatteras White) today, and it isn't enough.  I'll buy another $40 quart and sand the interior semi-seriously and see if I can get a good finish coat or three.   I can feel the resistance of my patience flagging... I want to be done, I want to be in the water.  I need to suck it up and get a good interior finish in place.  I'm guessing three coats.

Interior lives

Image
Recent days have witnessed a series of two hour spurts of progress that seem to stretch out like silly putty, distorting time and results.  I finished the daggerboard case, multiple epoxy glue-ups that finally came together as a piece: case cheeks, logs, vertical spacers, floors, forward cap, and top cap.  I got them installed and the result is very solid, tied together and screwed into the keel and epoxied. I shaped the daggerboard so that it would slide easily into the case, and profiled the cross section below the water line according to the plans.  Handplanes and random orbit sander did the trick. I glued in the inwhale spacer blocks, figuring they would benefit from being painted with the interior of the hull, with only the tops varnished with the entire rail assembly. The breasthook went in, with epoxy and bronze screws in from the outer rail.  Shaping it with a nice crown was pretty straightforward. I put two coats of undercoat on the entire in...

Little stuff

Image
I started assembling the case today, realizing it is going to take several stages (days) of glue-up to put it all together.  Taking a cue from the book (duh), i decided to glue just one of the cheeks to the case uprights.  It will be best to paint the insides before assembling the case, and I may even include a few inches of anti-fouling paint on the lower few inches. Tomorrow I'll glue the other cheek to the assembly, and fit it into the slot in the keel to make sure it will go together and mate with the floors at stations 2 and 3.   The third stage will be to add the end cap, logs, upper rails, and topcap.  There will be some additional cosmetic trim pieces that will hide the aft edges of the case cheeks and improve the visual balance of the case.  All but the top-cap will be painted.  The top cap will be finished bright, as it will be perpendicular and contiguous with the midships thwart.  The other thwarts, quarter knees, knee braces...

The daggerboard case

Image
Today I sorted out the daggerboard case.  It is the focus of quite a lot of stress during sailing, not a component to be underbuilt.  It wasn't clear to me how best to integrate it with the midships thwart and the floors at stations 2 and 3.  My MO is to work through it a a component at a time, and see if they all work together.  I just don't have the experience to lay it all out on paper and do it. At a late moment, I decided to make the dagger board only 9 inches fore-and-aft (the plans specify 12), and the slot in the bottom is 12 1/4 inches long.  My reasoning was that I've seen lots of daggerboards for small boats closer to 9 than 12, and on Ripple, storage is an issue, and a 9 inch board would be easier to stow.  Oh, and I had a suitable piece of sitka spruce 9 inches by 4 quarters.  And straight and true. This meant re-engineering the case verticals to fill in the 3+ extra inches.  Doing so has the additional benefit of st...

Floors

Image
Floors are really just partial ribs, giving some additional structure to the bottom of the boat, as well as providing bearing surfaces for the removable floorboards.  They straddle the keelson, spanning the garboard and second strake, and are glued in with epoxy.  I elected to pattern each with scraps of planking material... easier to shape than the 4/4 yellow cedar.  Still, spiling the shapes to the bottom at each of 4 stations turned out to be fussy work, especially for the first couple.  Running out of propane for the heater in the middle of the work made for a long session. When each pattern was close, I traced the profile onto cedar blanks and bandsawed them to shape, and adjusted the profile as necessary with a block plane.  I improved sufficiently over the sequence to motivate me to redo the first of them. I left the floors at stations 4 and 5 un-shaped on the top. as I have not yet decided how to tie them into the daggerboard case. About 6 ho...

Thwarts and ledgers

Image
This week's temperatures have made it difficult to spend much time in the shop.  Well, that and the Seahawks parade, for which I took the day off.  Yesterday I glued in the thwart ledgers, which took two hours or so of fiddling, measuring, remeasuring, gluing, clamping, and double-checking.  The glue-ups worked out well enough... one had slid slightly out of alignment, but I had left them square, to plane subsequently, reasoning that this would afford good opportunity to make any fine adjustments that might be necessary.  It did. I resolved to cut, fit, and sand the thwarts so as to be able to bring them home to varnish while I continue to work on the interior.  Le Tonkinois, the varnish I use and love, has such low solvent content that you can varnish in the house without much in the way of noxious odors.  This I will do with a number of parts.  The workship is no fit place to varnishing. I got the thwarts done, including rounding over t...

Filleting the interior

Image
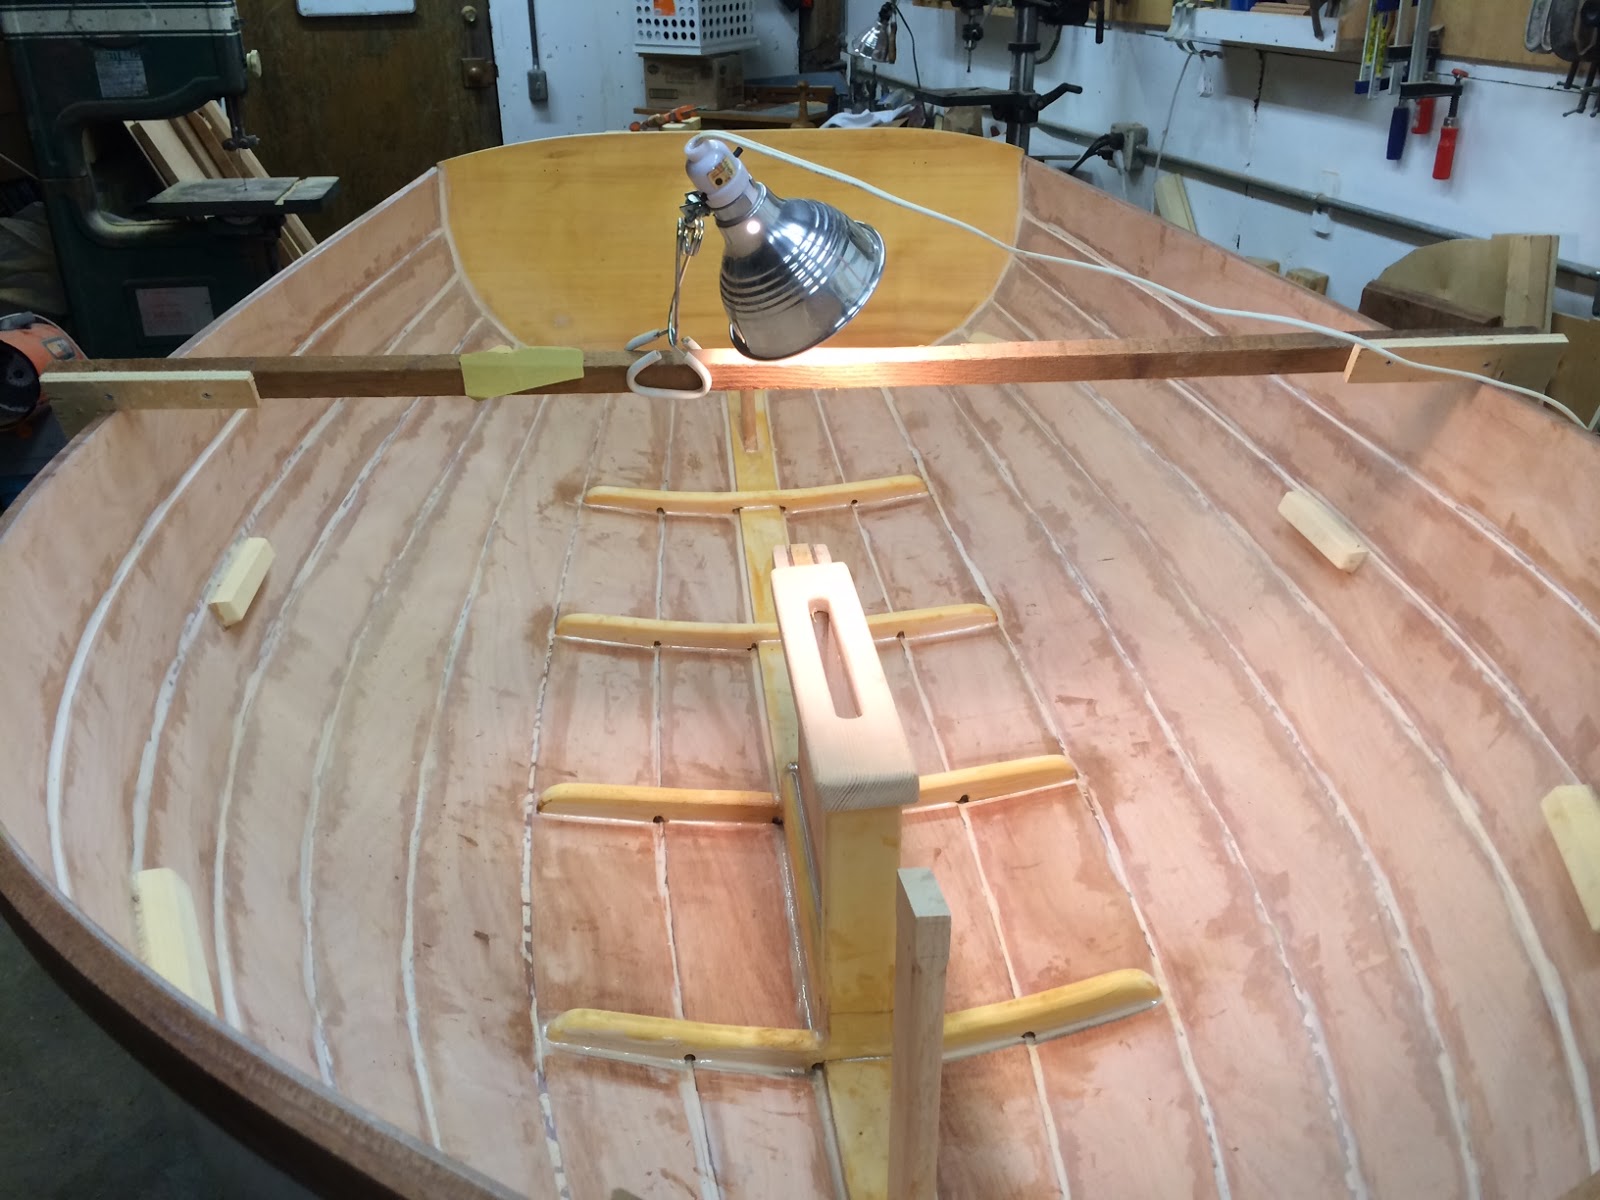
I fit the breast hook this morning, beveling the lands and trimming the ears that will serve as lands for the inwale.  Seemed to go pretty well.  Thinking about the near term order of battle, i realized I can't even think about painting until the interior seams are filleted, so I mixed up some epoxy peanut butter and got about it. I ended up using 6 pumps of epoxy, thickened with three heaping putty-knife loads of fairing beads per pump.   A messy job, and I have a headache from being that close to live epoxy for the better part of three hours.  Nice to get that done.

Inwale parts (continued)

Image
I worked on a lot of little bits today, as well as re-checking the inwale layout.  I also realized that I had to get the thwart ledgers (risers?) installed before putting on the inwales, else I'd have some difficult clamping challenges. I glued up the breast hook yesterday, epoxy with two reinforcement lag bolts as splines (threaded into one half, heads cut off and seated into holes on the other half.  I set up a clamping jig to help assure a tight joint.  The result looks good and seems to fit the bow profile nicely, at least before the fitting and beveling necessary before glue-up. Last night I finally figured out the dimensioning of the daggerboard case and the center thwart.  The case is dimensioned to the distance between the underside of the center thwart and the keelson.  The distance is established by setting a reference stick between the points where the the thwart ledgers will be set and measure the distance.  It was fooling around with ...

Inwale parts: Jig for inwale blocks

Image
I layed out the inwale spacing today, epoxied the two halves of the breast hook blank together, created blanks for the quarter knees (Alaskan yellow cedar) and made the spacer blocks. I'll sand and pre-finish these parts bright before installing them.  I made a jig that allowed drilling a hole dead-center, then cutting it to lenght (1.5 inches) with the dozuki thin-kerf razor saw. The jig took an hour or so, and turning out the parts took a half minute or so each.  I ripped off three dozen (I'll need 22 good ones). The quarter knees are made from the cedar also, cut on the diagonal into a knee-like-shape.  I'll soften the edges on a piloted round-over bit, and fit them to the profile of the intersection of the topsides and the transom. The breast hook is mitered on the centerline, and fit to the inside of the planks.  It has ears projecting along the inner rail that are the thickness of the spacer blocks, and on which the inner rails lan...

An (in)wale of a job

Image
The boot stripe is done ... on to the interior I've settled on a layout for the inwales.  They will be open, that is, with two continuous rails sandwiching blocks alternating with spaces.  Oarlock pads are 4 inches of inwale length each, and the quarter knees and the breast hook are 7 inches each.  I built a simple spreadsheet to allow me to find the appropriate component lengths by trial and error.  I'll use this table to cut and layout pieces (possibly slightly modified according to circumstance). Inwhale layout Block length space length 1.5 3.75 open inwhale components length number total Quarter knees 7 1 7 n blocks 1.5 2 3 n+1 spaces 3.75 3 11.25 Oarlock Pad 4 1 4 n blocks 1.5 3 4.5 n+1 spaces 3.75 4 15 Oarlock Pad 4 1 4 n blocks 1.5 6 9 n+1 spaces 3.75 7 26.25 breast hook 7 1 7 calculated inwale length 91 measured inwale length 91

Bottoming Out

Image
I declare the topsides done.  If you want to see if they look decent, you'll have to come sailing with me. In the words of the Mary Tyler Moore show, they are 'not awful'. I pulled the tape and retaped for the bottom paint.  Pretty easy as I had an edge to tape to.  The bottom paint is the remainder of a gallon I had left after the bottom job on Ripple this past summer.  Plenty to do a couple more coats on top of the two I applied, but two should be enough.  I put on two coats in as many hours, the first having dried in an hour or so with the help of the propane heater I use to take the ice out of the air. While the paint was drying, I shaped two octagonal spar blanks from 2 x 2 inch blanks of sitka spruce.  Two inch cross sections are actually smaller than the plans call for for the mast (but not the sprit-spar), but I am making them from an 8/4 plank of clear grained sitka spruce,  and I am thinking that will be plenty hefty.  I bought ...

Its not a piano

Image
My brother tells a story of a Tidewater boat builder  in Virginia who's disclaimer for less-than-perfect finish work was It's a boat, not a piano.   Of course, he built beautiful boats largely without defects, and mostly by eye.  That ain't me. I've been struggling mightily to get a coat of Brightsides on that I wouldn't be ashamed to acknowledge as my work.  Two undercoats and 6 finish coats later, I'm not there.  I don't recall having anything like this difficulty getting the topsides of the canoe looking good.  Or even Ripple , which is far from perfect, and was done in the sun, where keeping a wet edge was a race against time, juggling holidays and sags. I tried foam rollers, which don't seem to carry enough paint to avoid holidays, I tried mini nap rollers, which covered much better, but but left so much lint behind that i had to sand off nearly the whole coat.  My latest attempt is simply brushing.  Still wet, it looks better than any...

Prime Time

Image
 The first paint went on the hull today.  I primed the exterior with Brightsides primer, rolling it on with a conventional roller.  Not sure that will be my choice for the finish coat. Paint exposes all your sins, but I am happy with the results.  I'll sand the first coat and put a second primer coat before a finish coat of Brightsides white.  Same as Ripple's topsides.

Rails

Image
I got off the starting line for rail installation today.  Some approach-avoidance going on here.  I glued the first of two laminations for the outside rails.  I didn't feel I could bend the size stock specified in the plans around the forward quarters of this bluff-bowed boat.  Laminations will improve strength as well. Having the first layer of rails will really increase the structural integrity of the hull.  I've been very nervous having the boat off the jig without them.  Scary with chisels, too.  I'll do both laminations and pop the boat back on its jig and finish the bottom. The rub rails have me thinking about the inwhales, and that requires decisions about the breasthook, the quarter knees, the style of the gunnels (I'm going to do open gunnels, for sure... wouldn't want to actually finish this boat too soon!) There are also decisions about the oarlocks that have to be thought through.  I bought bronze oarlocks and gudgeons (two set...

Paying the Piper

Image
My first efforts with fiberglass go back about 50 years,  patching a rotten old wooden dinghy in 1963.  A little British Seagull 1.5 horse outboard pushed that pram all over the cypress swamps of Seashore State Park in Virginia Beach, Virginia.  Hog heaven for a 14 year old with his first boat all his own. As I recall,  my efforts at patching weren't all that effective.  The only remnant of that boat is her transom name plate, pictured above. Over the years, I have dabbled with polyester and epoxy resins on kayaks, and even built an okume plywood lapstrake canoe with my friend Thom Hickey (a mere two decades ago).  Still, I have been a bit cavalier about the admonitions concerning clean up along the way.  Sunday I paid the price --  some scary moments with chisel and scraper. It is one thing to face up to a few hours of unpleasant work to clean up a mess.  The trouble with this effort is that there is actual risk to the integrity of ...

Off the Mold!

Image
The sistered-keel glue-up worked fine and it looks good.  I rough-cut the daggerboard slot with a sabre saw and then used a piloted strait bit on the router to finish.  Some sanding and final shaping of the skeg is all that remains before I prime the bottom. I couldn't resist popping the boat off the mold to see what the inside looks like.  There is a LOT of cleanup ahead before any serious work gets done on the interior.  I honestly don't know at this point whether it was worth while taping off the interior of the planks before I glued them up.  The tape is difficult to get off where the epoxy is thick.  Removing it is a tedious job with a scraper and chisel, but I think it would be even worse without the tape. Ideally, one would clean up the squeeze-out at the time of glue-up, but the space between frames is so small on this boat that getting at the seams is difficult and awkward. I may be singing a different song after a few hours of chiseling and...